Table of Contents
Selecting Tasks #
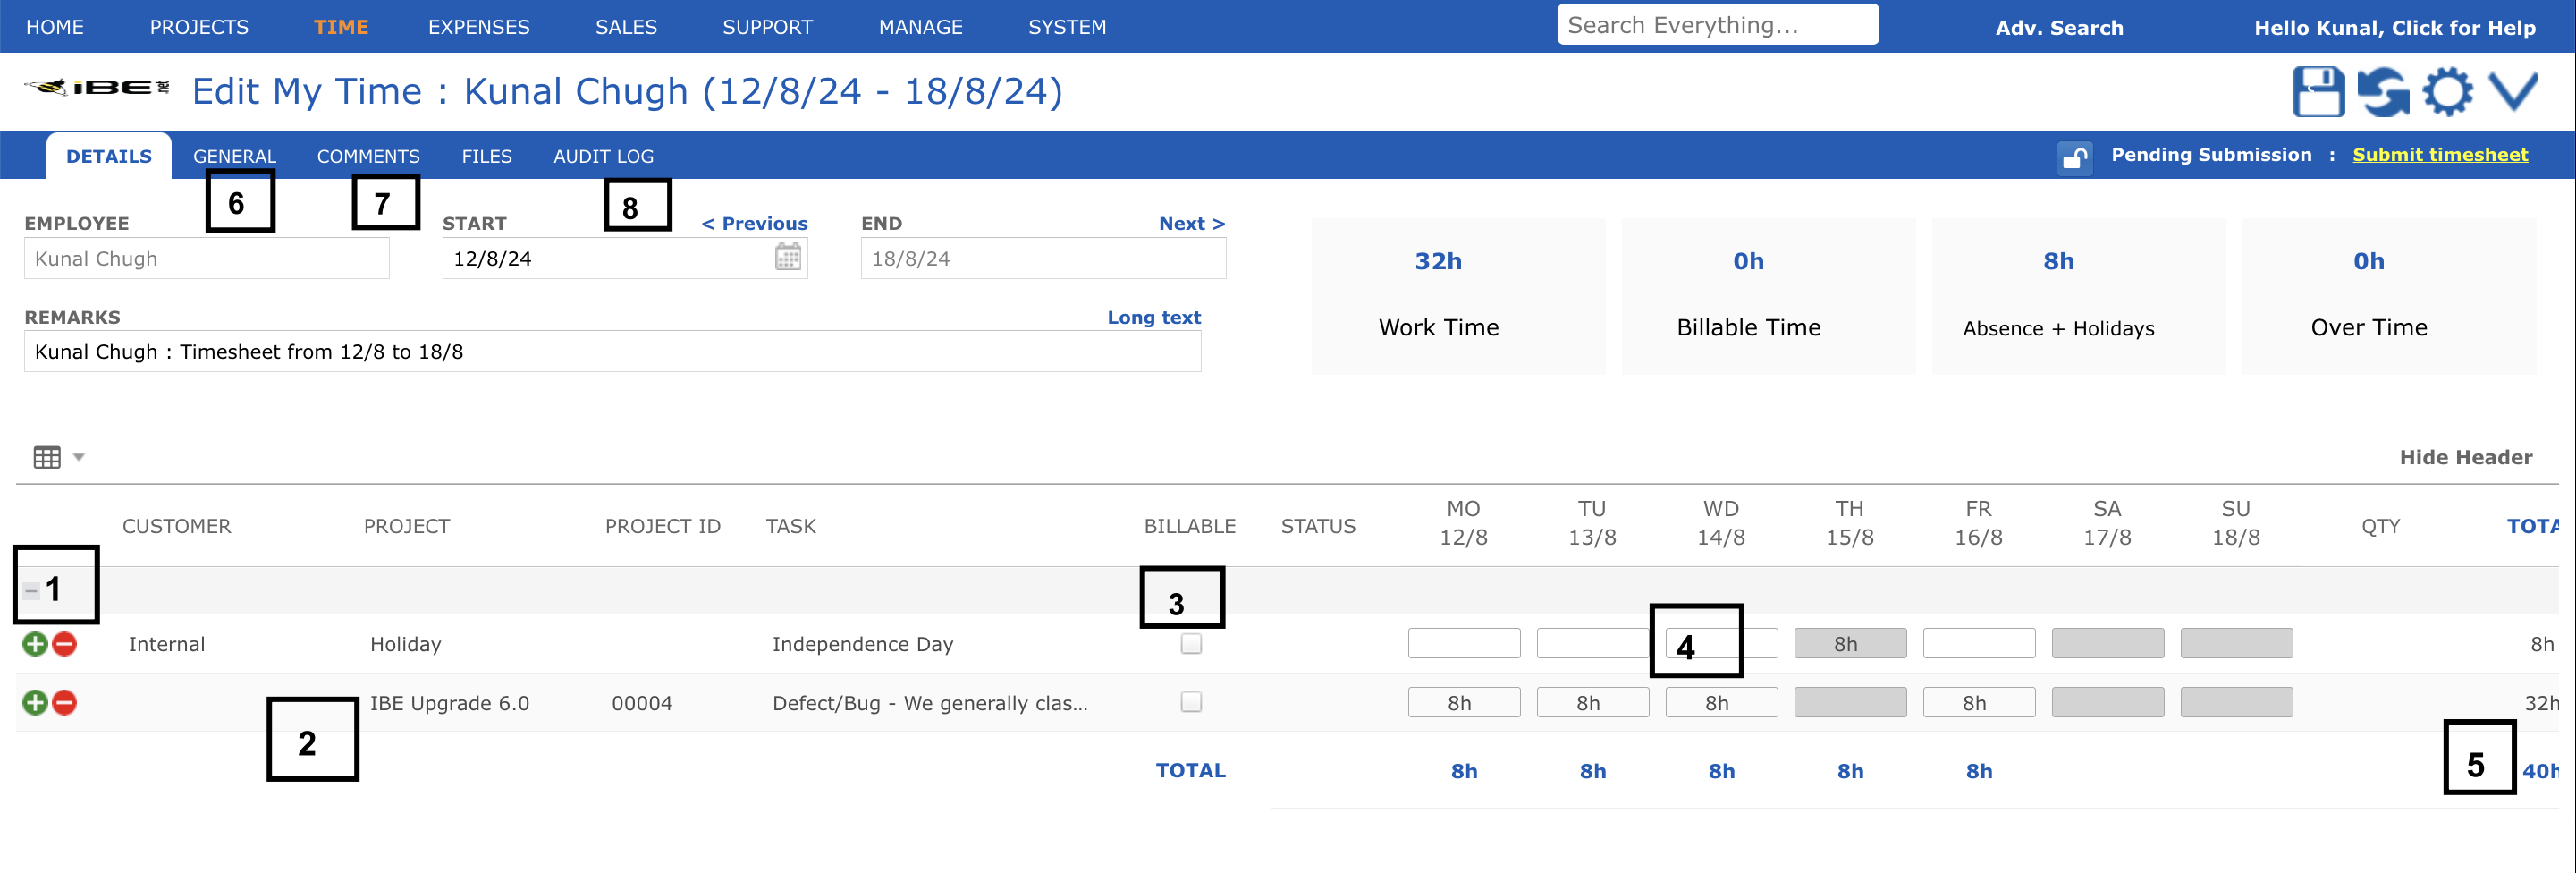
Once you have opened an existing or created a new timesheet, you will normally go to the timesheet overview, showing all your time entries for the week (or alternative timesheet period).
- The top section of the screen is a table with rows for each customer, project & task and columns for each date
- The lower section provides a series of tabs with detailed information on each task/date entry as well as general overview information.
In the timesheet overview you can:
- Click on add row ‘+’ icon to enter time against a new customer, project & task or department. Or click on the delete ‘x’ icon to remove an editable task’s time for the whole week
- Select the customer, project & task or department to book time to
- Check if your time is billable to an outside customer or not. If the time is billable on an hourly basis you can mark it as non-billable
- Enter the hours or days, hours and minutes that you worked on that particular task for that date. You may enter decimals or fractions of an hour (e.g. 1.25h), or hours and minutes (e.g. 1h 15m)
- As you enter time the total hours by task or by date are compared to your standard work-schedule hours
- View general information about this timesheet such as when it is due, total vs. billable vs. time-off hours, your work-schedule and header remarks
- Add comments and view rejection comments; or attach and submit files with this timesheet
- View the history of changes made to this timesheet.
You may only book time to tasks which meet the following conditions:
- You must be assigned as a resource
- The task must be due to have started or actually started by the date of the time entry
- The task must be still open (not finished) by the date of the time entry


