Adding Tasks to a New or Existing Project #
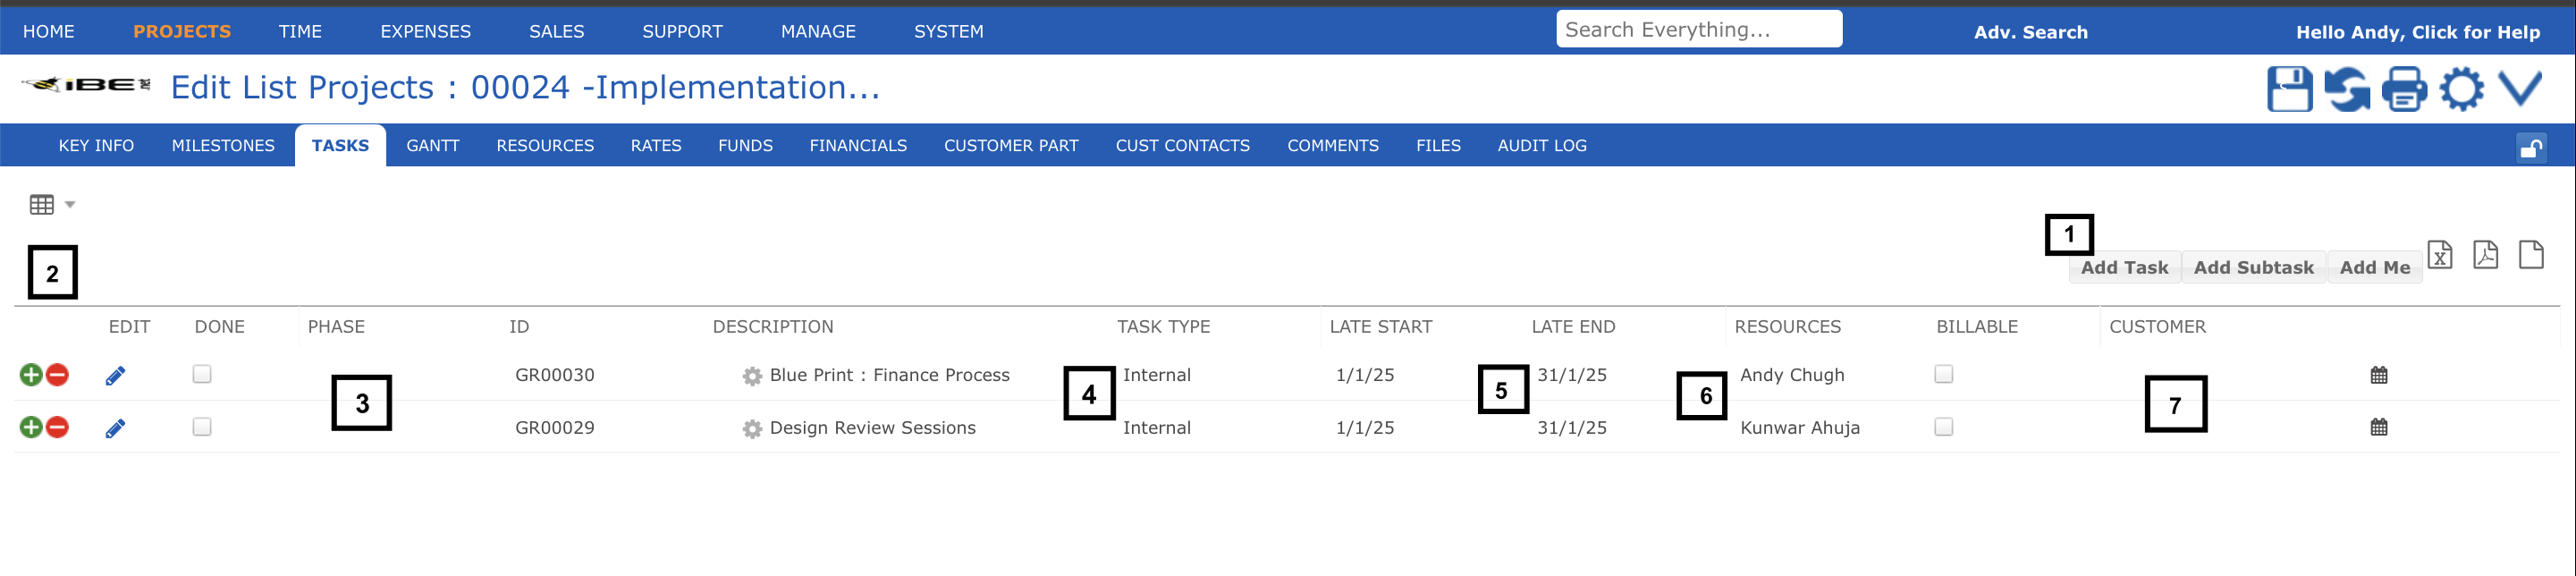
Create or open your project and the ‘TASKS’ tab will be normally selected.
- Click on Add Task to add a new task
- Or you can click on add row to insert a new task under an existing task.
- Describes the phases in the task.
- Several fields such as priority, task type, service, person responsible and even task resources (people doing the work) may default depending on your task type and project type settings
- Your new task is set to start the day after the task in the row above ends with an initial duration of one day. Unless your project ended already in which case the new task is set up for the project’s end date. You can of course change either date, as long as the task falls within the project start and end dates
- Select one or more people who will deliver this task as resources
- Displays the customer’s name assigned to the project.
Add Several Task to a Project at One Time #
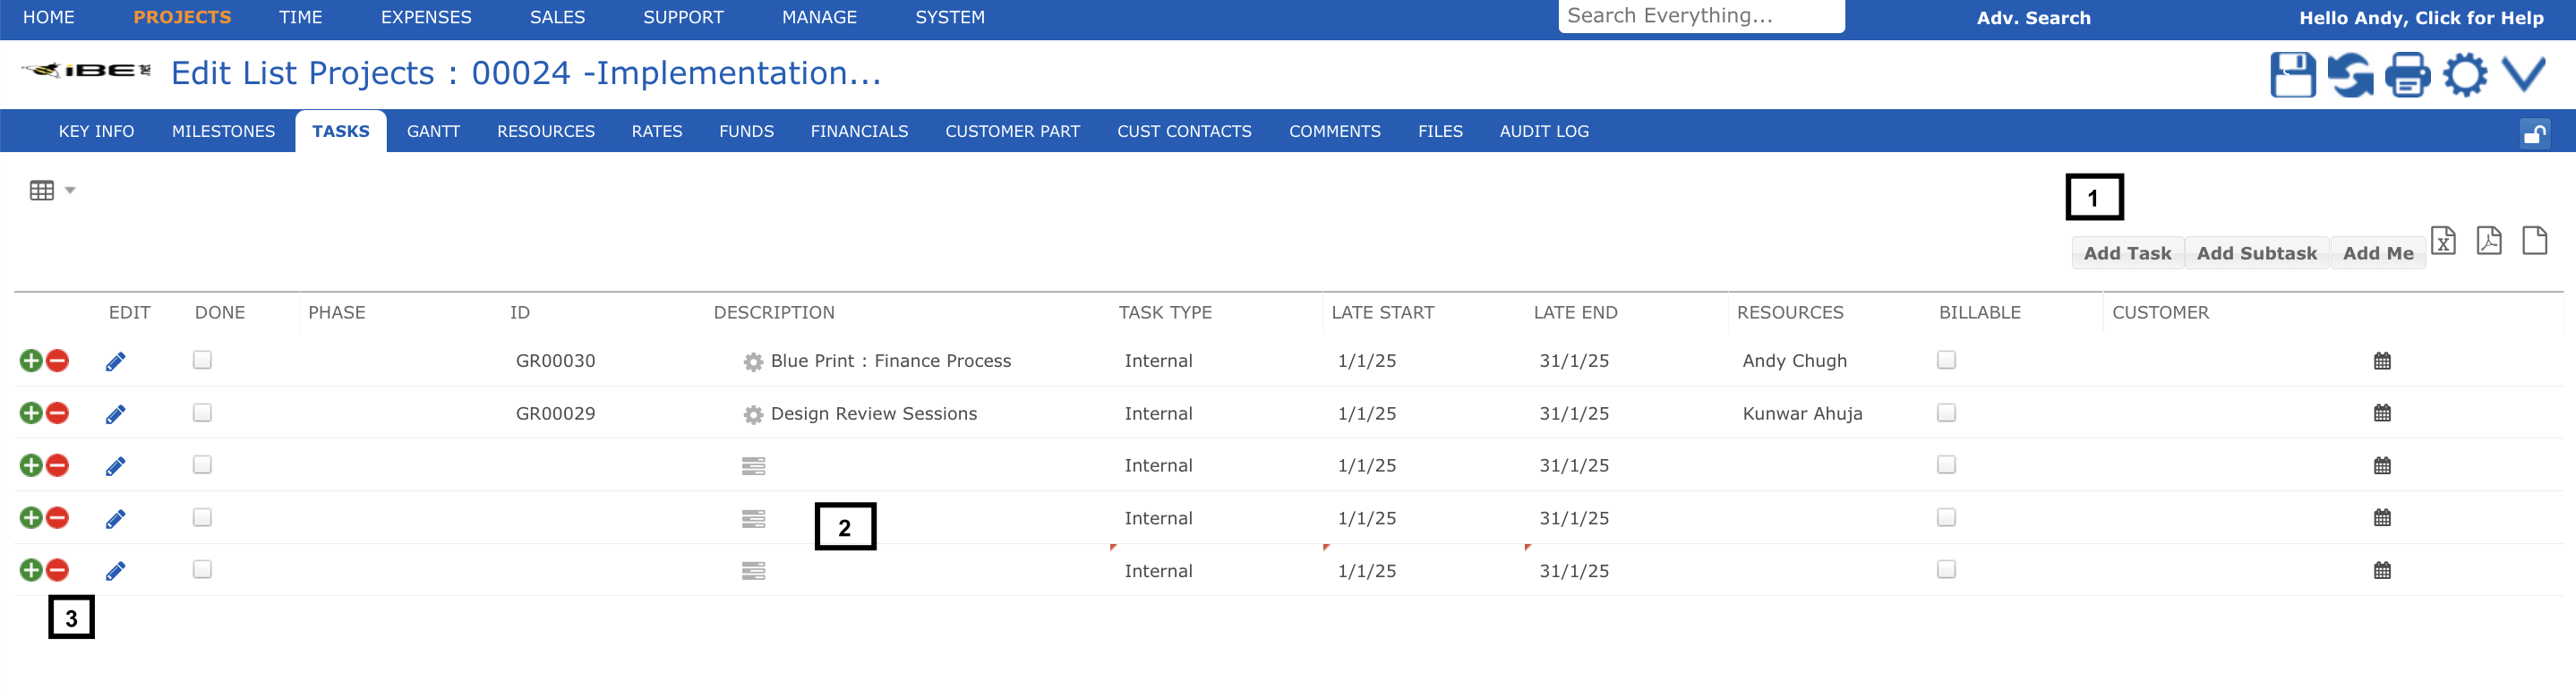
You can click on (1) Add Task several times to add multiple tasks at once to your project. When you have entered the first task description press the RETURN key to move directly down to the next row (2) and enter the next task’s description. Or use TAB to move across the columns for that task. This is a very fast way to enter a lot of tasks.
You can also add tasks to a project by copying the project from one with similar tasks to the ones you want, or by creating your project with reference to a template project.
If you added too many tasks by mistake click on the delete row icon (3) to delete rows. Just be sure that required fields have been entered for all added tasks before you save your project.
Required task fields are description, type and start/end dates which anyway default. Task type often gets defaulted in as well. In exceptional cases your system administrator will have set up your task type so that you must enter a task ID.


